Garden Blog - Top Tropicals

Date: 24 Jun 2018

TopTropicals

Fruitful Fruit and SuperFood...

Q: I have a large fruit garden here in Florida with many mango trees, avocadoes, guavas, and other tropical fruit. Last year hurricane Irma and flooding killed a few avocado trees, but mangos and guavas survived OK, but the sad part is, very few flowers this year and almost no fruit setting. I noticed on your website your Superfood and Sunshine-Honey boosters that supposedly help fruiting? But I am afraid it is too late now as your instructions say first application must be in early Spring? I wish I discovered earlier that my trees wouldn't want to fruit this year...

A: First of all, it is never late to give the food! You may start applications of SUNSHINE products at any time of the year. The best results will be achieved once you treat your plants on regular basis throughout the whole year cycle of metabolism.
Couple weeks ago we started harvesting our 2 guava trees. These two are the same variety (Variegated Honeymoon), planted within 20 ft from each other and growing in the same conditions. The only difference was, one was treated with SUNSHINE-Honey and SUNSHINE-SuperFood, and another one didn't get any treats in order to have a control plant.
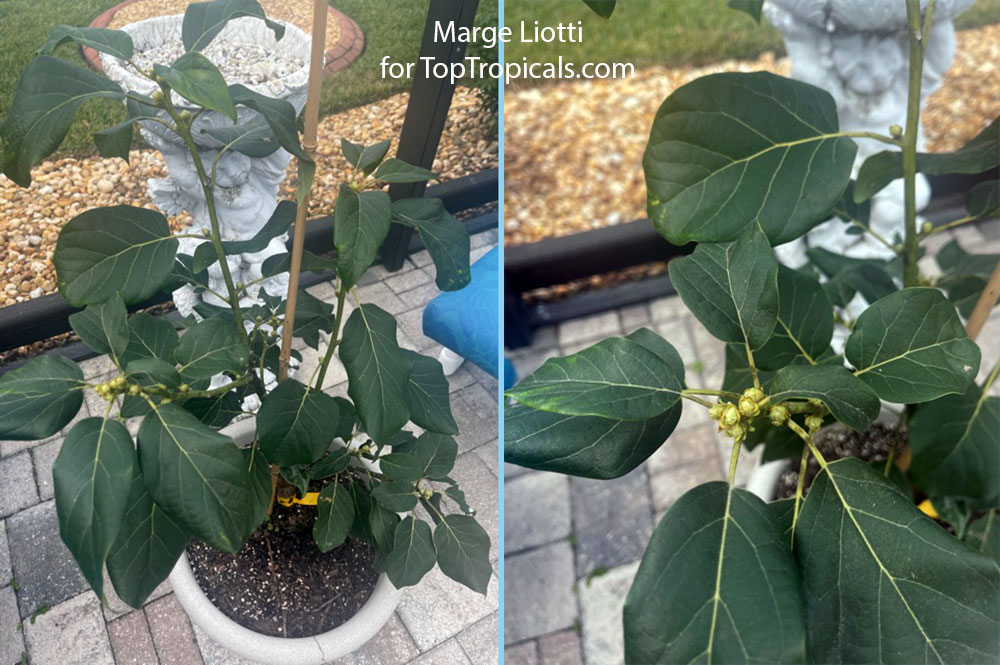
Results are very interesting, see the picture. Both trees were heavily covered with fruit. However the one with treatments developed fruit that is much larger, much sweeter and juicier, and the most interestingly - with less seeds, almost no seeds!
To answer your question: yes, you can start feeding your fruit trees right now. It is still a Springtime. Many mango varieties have late season; even early varieties may delay their fruiting if flowering triggered by miscro-elements. Guavas have very long season and most varieties can have multiple crops throughout Summer-Fall.
Here is a simple and affordable feeding schedule to help your fruit garden recover from last year hurricane stress, and establish reliable production:
1) SUNSHINE-E - for boosting metabolism - once a month
2) SUNSHINE-Honey - for bringing sugars to the heart of the tree and boosting fruit sweetness and quality - now and in 2 weeks
3) SUNSHINE-SuperFood - for overall health, recovering from hurricane and fixing root damage from flood - now and every 2 weeks throughout warm season.
4) You may apply regular balanced fertilizer NPK as usual (we apply once a month, a handful per in-ground tree)
It's that simple. Just try and watch your trees produce again!

Check out all SUNSHINE boosters... We offer FREE shipping on them, so you can make your plants happy!

Date: 11 Oct 2019

Fun of growing your own Pepper

By Onika Amell, tropical plant specialist

Q: Can you grow your own black pepper plants in the USA?

A: Who does not love the smell of freshly ground pepper, especially that lovely combination of white, green, black and red peppercorns, which are so much more interesting than just plain black corns. Yes, you can absolutely grow your own pepper! Peppercorns come from the plant Piper nigrum.

Growing Pepper Plant

Black pepper plants are actually vigorous vines, although they are pretty slow growing and can be kept in a pot as a compact plant. But they will need a strong support to climb over. Indoors, you can provide this support by installing a trellis in a large pot. Some gardeners prefer to grow them as a hanging plant instead. In warm climates, you can plant them directly outdoors in a protected location with partial shade. These plants need rich, moist, well-draining soil and warm, humid conditions. Peppers do not like temperatures below sixty degrees, although they can survive some cold spells. It is very important to bring these plants indoors or wrap them in a blanket if colder weather arrives.
If you live in colder parts of the country, you can certainly grow peppercorns in large pots. Grow them outdoors during the summer and move them indoors during the winter, or grow them year-round in your greenhouse. Houseplants will need bright light and consistent moisture. Spray the leaves regularly with a bottle of water to increase humidity. Do not allow room temperatures to fall below sixty degrees.
Besides the benefit of being able to grow your own gourmet pepper corns, the foliage, as well as the flowers on this plant, are beautiful in its own right. Off-white flowers appear from spring through summer, followed by slow fruit production. The berries will appear on spikes, with 50 to 60 berries per spike.

Fertilize this vine in the spring before new vigorous growth emerges. We recommend:
Tropical Greenhouse Plus - Plant Booster
Tropical Allure - Smart-Release Booster

You may be surprised to learn that black, white, green and red peppercorns are all the same seed on the same plant in the various stages of development and processing.

Black peppercorns are the most familiar and come from the corns that have reached their full size but are still green and not quite ripe. They are picked and allowed to dry in the sun. Enzymes in the berries cause the skin to turn black during the drying process. They are the strongest in flavor.

White peppercorns are the mature berries that ripen to a red color before being picked. After harvesting, they are soaked and rubbed free of the outer skin down to the smooth white underlayer, then dried and bleached by the sun. They are slightly milder than black pepper.

Green peppercorns are the unripe peppercorns picked at the same stage of ripeness as black peppercorns, but not allowed to dry. They can be pickled in vinegar or brine. They are the least pungent.

Red peppercorns are the mature, but unshelled version of the peppercorn. One can usually find them in some gourmet and health food stores. They can be quite expensive.

Ground pepper will only stay fresh for about three months, but peppercorns will last indefinitely. To make the most of your pepper harvest, store the peppercorns in an airtight container in a cool, dark location. Grind them immediately before use for the best flavor.
There is nothing like freshly ground black pepper simply combined with a good quality olive oil and a splash of balsamic vinegar. This makes a wonderful dipping sauce for fresh bread. Simple, yet elegant. All the better if the pepper was grown in your very own garden!

Date: 9 Dec 2020

Establishing Mamey Sapote

In the photo: Mamey Sapote lre-leafing.

Q: I purchased Mamey sapote last fall and am very excited about having it in my yard. It lost leaves during the winter, but then budded and put on a lot of beautiful leaves. I was hand watering since this covid stay at home event, and thought I'd put it in a larger container, 10 gallon. About 2 months after transplant and hand watering the leaves turned yellow. I cut back on watering, allowing some dryness between. Some leaves now have fallen off, but looks like new ones forming. What have I done and most importantly now, what do I need to do so she survives? I haven't yet decided exactly where to plant her... so hoping she can stay in container for a bit longer while recovering.

A: It is possibly a combination of over-watering and seasonal changes (re-leaf). During this time of the year, Pouteria sapote loses old leaves and grows new ones. This plant is semi-deciduous, which means, it drops leaves during unfavorable conditions (too dry, too wet, too cold, to hot, etc. = any stress). The new buds are healthy. Give it a couple of weeks. Reduce watering. Don't water again if the soil is still moist. If planted in the ground, it will be easier to control the moisture, as long as you plant it high enough (at least 3-4" above the surrounding area, like on a little hill, for a better drainage. See how to plant a tree.
Once you notice a new growth and healthy leaves, give the plant some food:
SUNSHINE C-Cibus - Crop Nutrition Booster
Mango-Food - Smart Release Fruit Tree Booster


Date: 18 Feb 2021

Healthy Plants - Q&A from Mr Booster: Feeding Avocado Tree

Q:We bought one of your avocado grafts and it's doing great, lots of buds for fruit. It's still in a pot and fertilizing with the Sunshine Boosters. Should we continue with this product? We'll plant it in the ground in March. Thought you'd enjoy pictures of our wonderful tree. No freezing temperatures in Riverview, but when it got down into the 30s, the plant came in. One good thing about growing in the pot. I'll be buying some more Sunshine Boosters. This stuff is working great on all our plants.

A: Congratulations with a good job on growing avocado over winter. Avocado trees are not easy, we are happy to hear that your plant is ready for production, this is amazing! We've noticed that Sunshine Boosters perform miracles. Here are some suggestions for you:
1) Continue fertilizing with Sunshine Boosters according to the feeding chart
2) When ready to plant, dig a large hole and fill it with good soil full of organic matter (compost mixed with existing sandy soil will be good). Make sure to plant the tree on 3-4" high elevation, like on a little hill. Avocados need perfect drainage and can't tolerate wet feet. See more info on planting and planting instructions (pdf).
3) Water daily with a hose, do not rely on sprinklers. Avocados like water (considering perfect drainage)
4) Continue applications of Sunshine Boosters at least until the tree is established and starts growing new branches with lots of leaves. After that, you can switch to slow-release fertilizers once a month if it makes it easier, but if you can, continue Sunshine Boosters at least on weekly basis - they really boost plant growth!

Date: 20 Apr 2016

5 secrets of propagation

How to propagate rare plants? It is exciting and fascinating process - to be a Creator of a rare plant collection. Sometimes when you have a rare plant, you baby it and wish you could have at least two of the kind, just in case you lose one to weather conditions or an accident... If you lose one, it hurts! Plant collectors know the feeling - it is always a good idea to propagate a few more of the rare kind. Here at Top Tropicals we know that feeling too, and we want you to keep your baby plants alive and thriving, multiply them, share with others, and make our planet better - one plant at a time! Know your different plants, and different ways of their propagation. Ready for the secrets revealed?

1. Seeds. The most popular way and in most cases the most reliable. Also, a seedling has a strong, vertical root system (cuttings or air layers have shallow roots). However growing from seed is the only sexual method of propagation (vs other methods - asexual, or cloning), which means, some varieties don't come true from seed. Similar to a baby born from two parents, blonde mother and brunette father, can have either light or dark hair... or even red, genetically provided by the great-grand father! The most important factors of success when growing from seed are - well-drained germination mix (check out our Seed Germination Mix #3), and a combination of perfect temperature (high temperature 80-90F induces germination, but some species like it cooler!) and mix moisture level (can't stay soggy).

2. Cuttings. In most cases, works great as long as you know the secret for this method: clean (sterile) soil mix (check out our Propagation Mix #2), warm temperatures and very high air humidity (not moist soil, but humid air!). Mist house works well (see picture) with periodically controlled foggers (5-20 sec of fog every 5 to 20 min during light time - depending on species, and temperature), but simple clear plastic bag over a pot or tray works as well! Large leaves should be trimmed in half, or more, to eliminate extra evaporation, and soil should be only slightly moist, not soggy. Remember to use rooting hormone that not only improves rooting but keeps away fungus problems. You are welcomed to visit mist house in our facility, we will be happy to share experience.

3. Air Layers. From our experience, key to success with this method is patience. Most air layers take a few months to set root. Keep sphagnum moss moist, and create air layers only during active growth season - Sprint through Summer. Use rooting hormone.

4. Grafting. This method requires the most skills and experience but is not as difficult as it sounds. Plants can be grafted withing the same genus (e.g. one Gardenia sp. on another Gardenia sp.). There are many grafting manuals on internet. Try once, and you will get addicted to grafting! In many cases it is the most effective method. Especially when seeds not available and cuttings don't work with the species, while grafting works much faster than air-layering. The main secret in grafting is using the right type of graft, which comes with experience. Another important thing is keeping grafting parts and tools clean/sterile. Treat/clean surfaces with anti-fungicides horticultural soap (Example: Abound anti-fungal, Green Shield soap) and use rooting hormone.

5. Root divisions. All gardeners know that some plants are best to propagate by rhizome/root divisions, like Gingers, Heliconias, or Iris. And not everyone knows that some fruiting and flowering trees don't mind to reproduce by root divisions. For example, Jujube - Ziziphus jujuba, and Strawberry tree - Muntingia calabura, readily produce root suckers. Watch out for them and don't let them go to waist when spraying weeds. All time favorites, fragrant Clerodendrums also like this easy method of reproduction, especially C. bungei, C. philippinum, and many others.

Check out our Growing supplies section for professional soil mixes and drainage components that are so important in your propagation success. At Top Tropicals, we often use Coconut Coir for propagation. Good luck in your growing, and remember - if you propagated a few extra collectibles, Top Tropicals may trade or buy from you!