Garden Blog - Top Tropicals
Date: 24 Jul 2026
🌿From Coffee Tree to Morning Cup 🍵
By Tatiana Anderson, Plant Expert, Top Tropicals

Smokey: With proper care, your morning cup can begin on your own coffee tree.
Sunshine: Excellent. I am removing coffee from my Sunshine Special subscription. Donuts only.
Smokey: Please wait until the tree actually produces coffee.

Most people meet coffee as a bag of roasted beans. The plant behind it, Coffea arabica, is an evergreen shrub with dark shiny leaves, white flowers, and red fruit, and it grows well in a container.
Coffee is a Fruit Tree
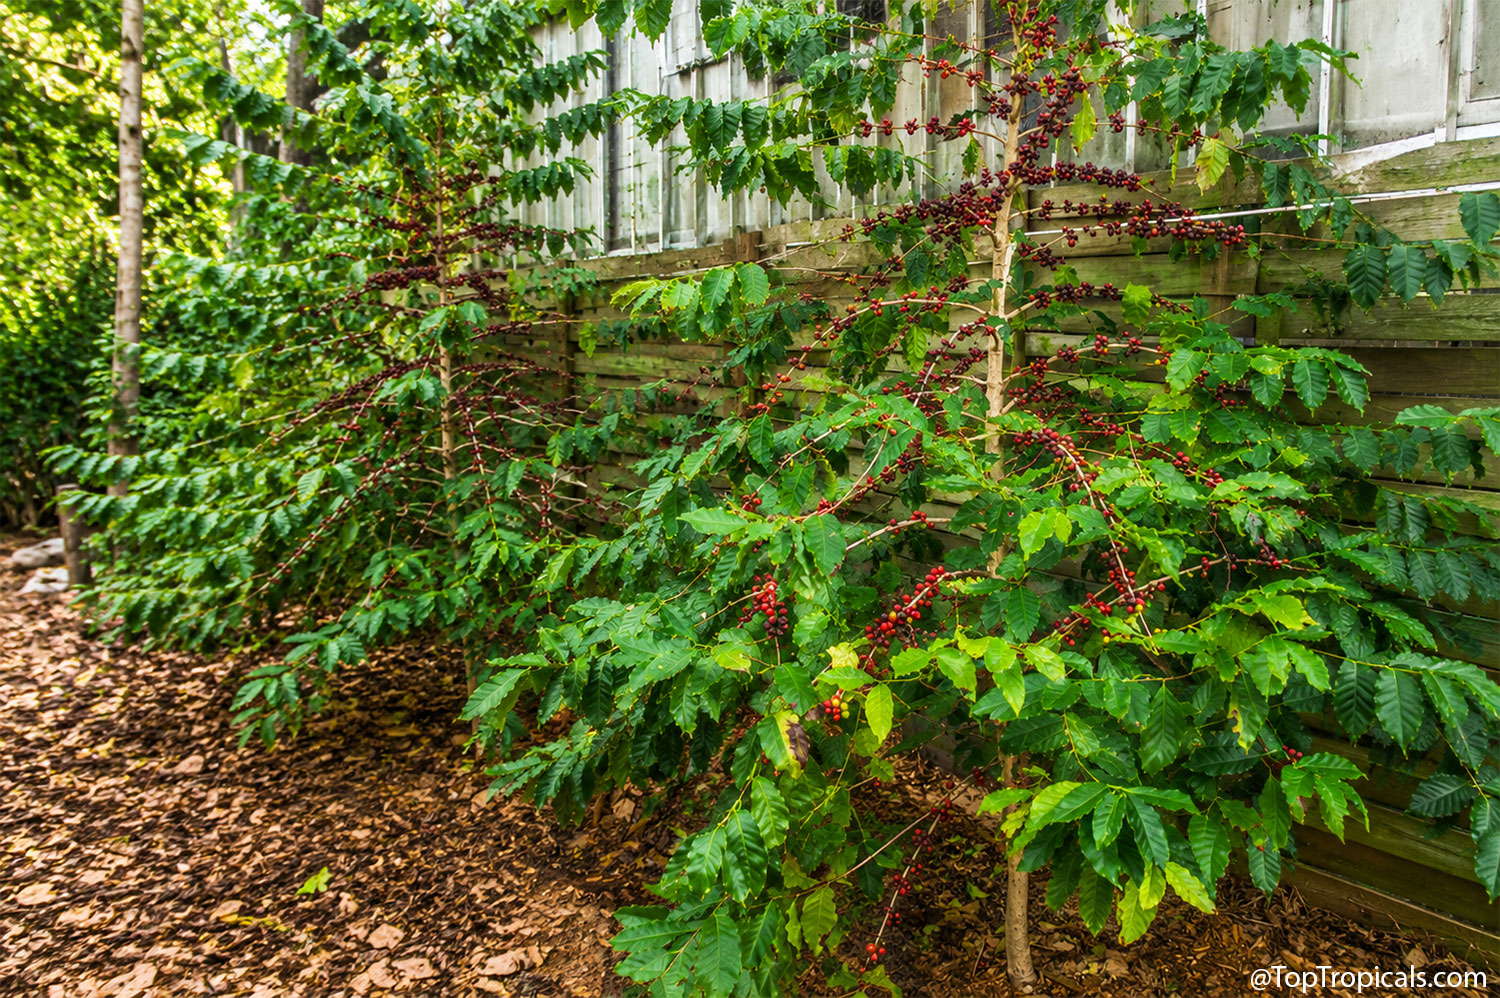
What we call a coffee bean is a seed. Each seed sits inside a small fruit, commonly called a coffee cherry, with a layer of flesh around it. The fruit starts green and passes through yellow or orange-red before reaching full ripeness in deep red, depending on variety and stage. The flesh around the seeds is edible, though the seeds are the part normally processed into coffee.
Why Coffee Does Well In a Pot
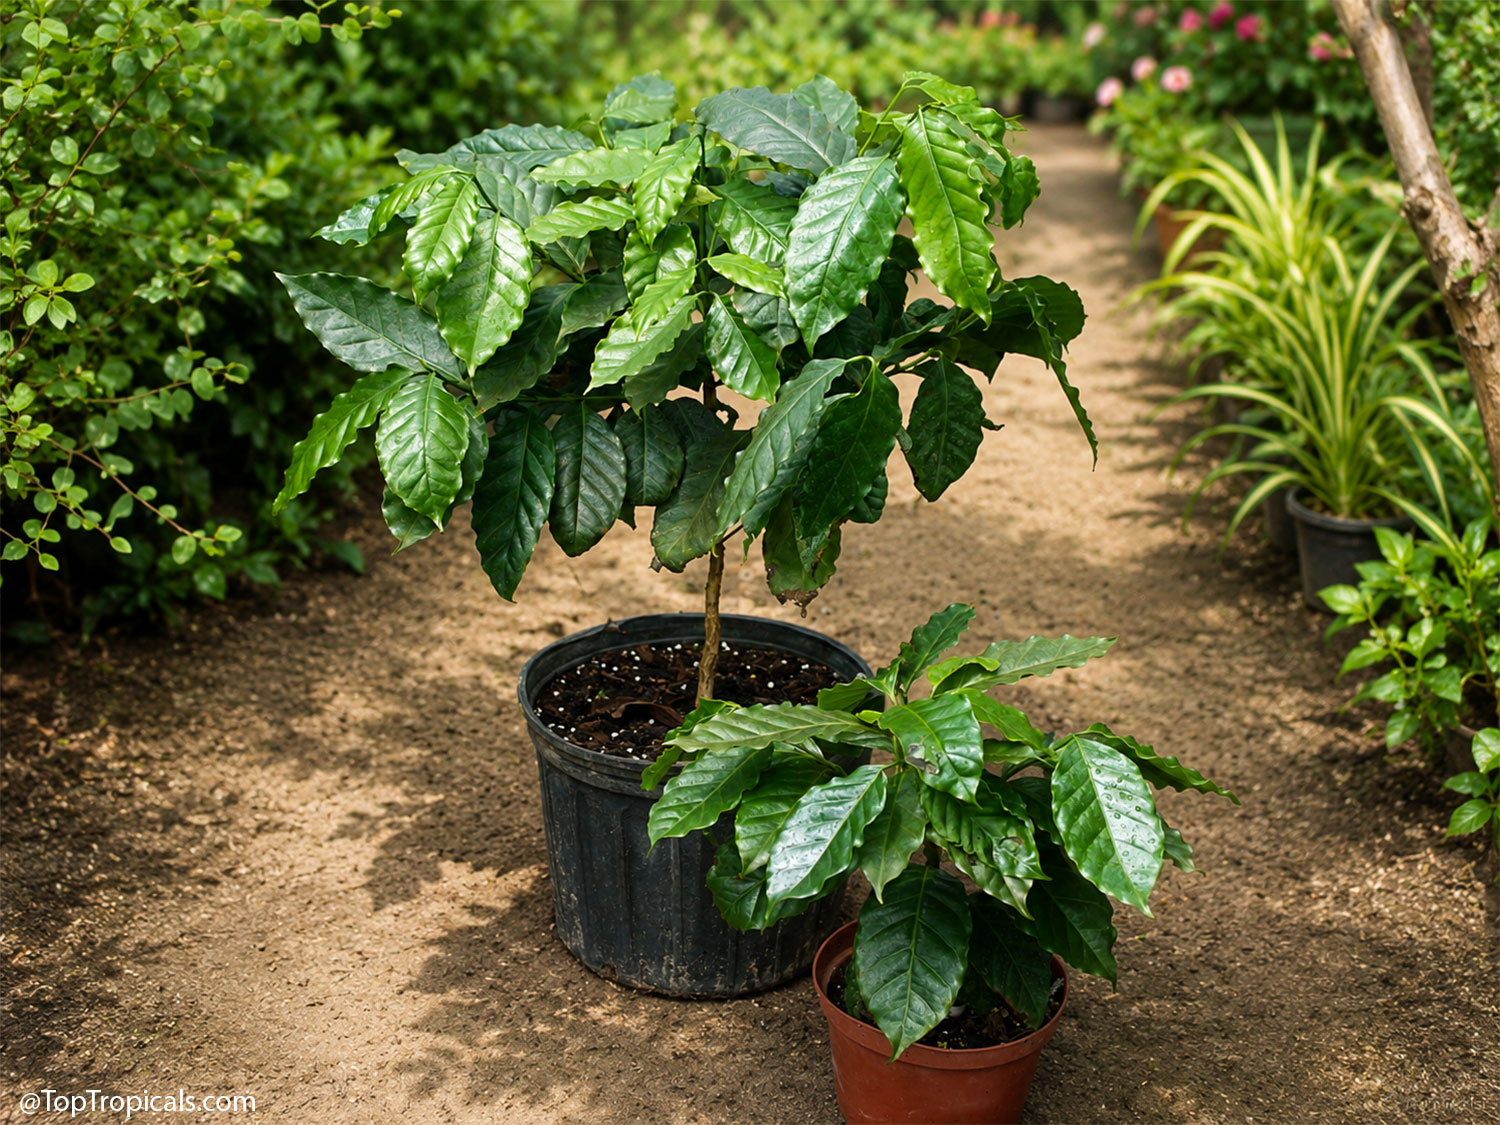
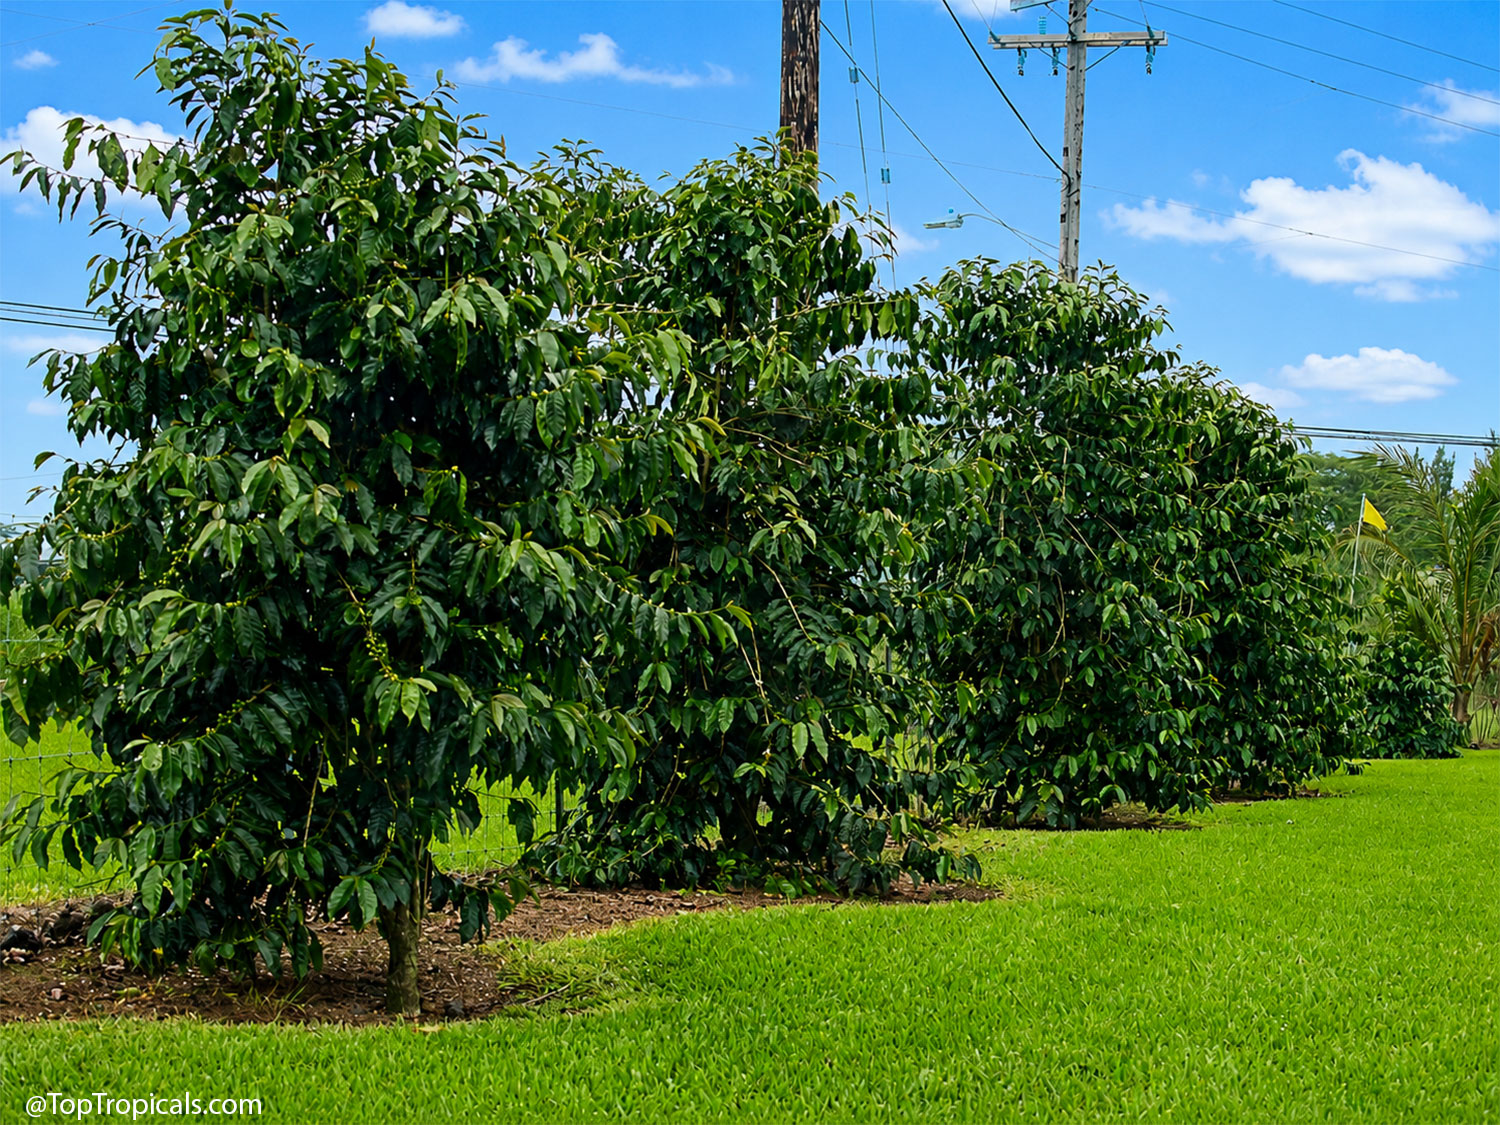
Coffee prefers bright filtered light or partial shade. Harsh, exposed afternoon sun scorches the leaves and bleaches their color. That preference is what makes it practical indoors. A bright window, a shaded patio, a greenhouse bench, or a warm-climate spot under high canopy all work. It stays a manageable evergreen shrub or small tree in a container.
The Flowers
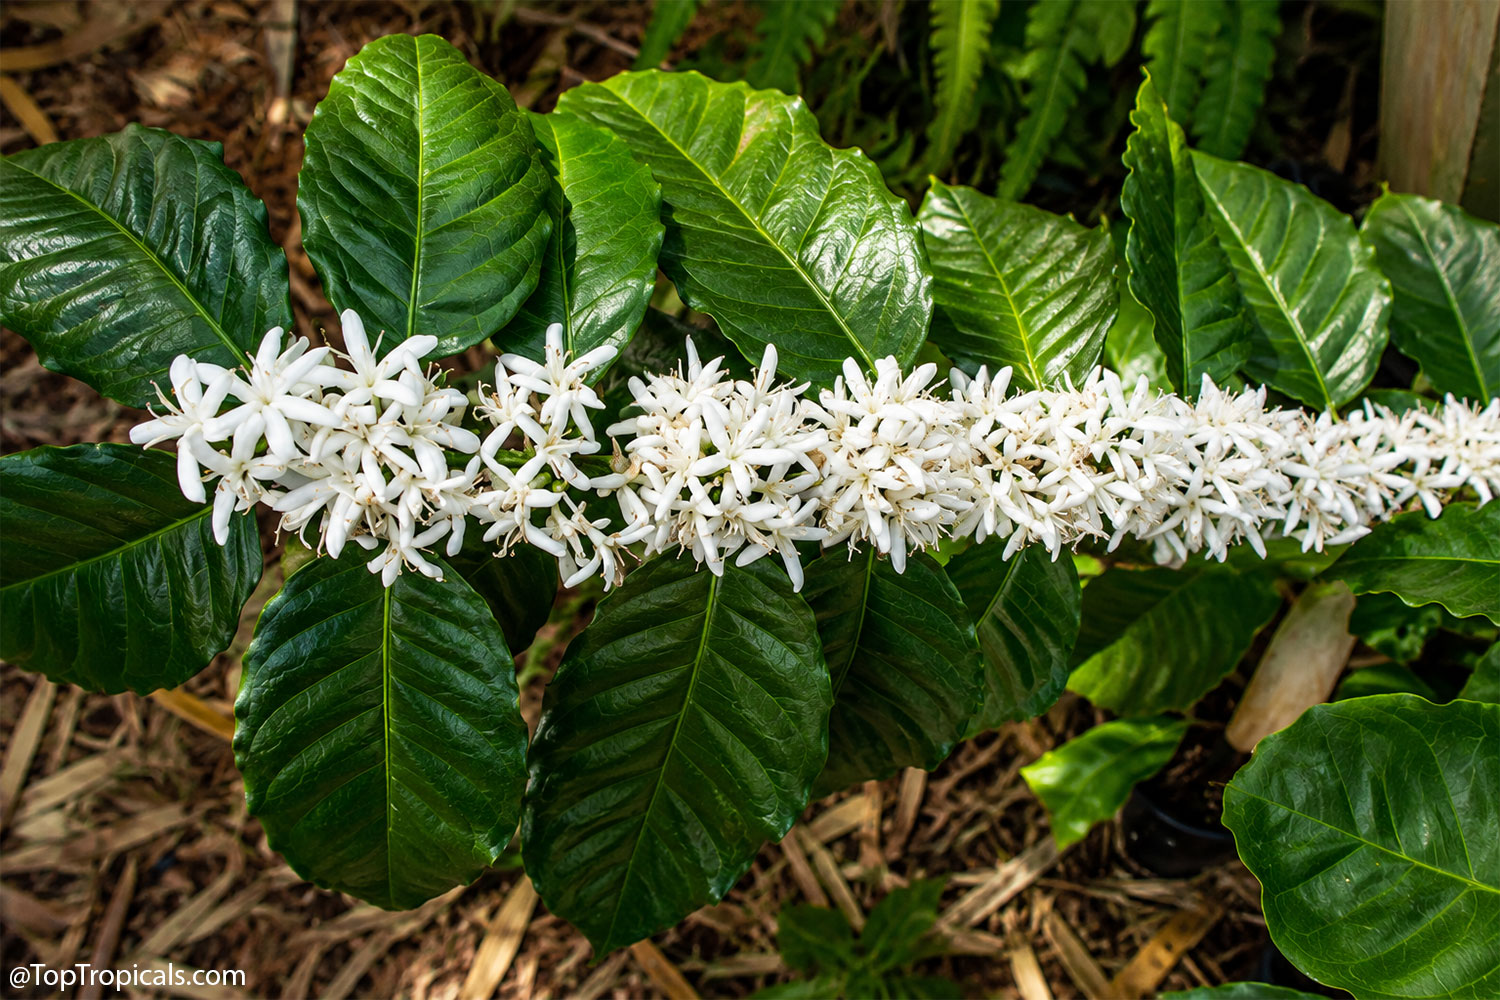
Coffee flowers are small, white, and produced in tight clusters along the branches rather than as single showy blooms. Their scent is often compared to gardenia or jasmine. Coffee and gardenia belong to the same family, Rubiaceae.
Flowering does not last long. A plant may open most of its buds within a day or two, and for that short stretch the whole branch is lined in white and the room smells like a gardenia hedge.
From Flower to Fruit
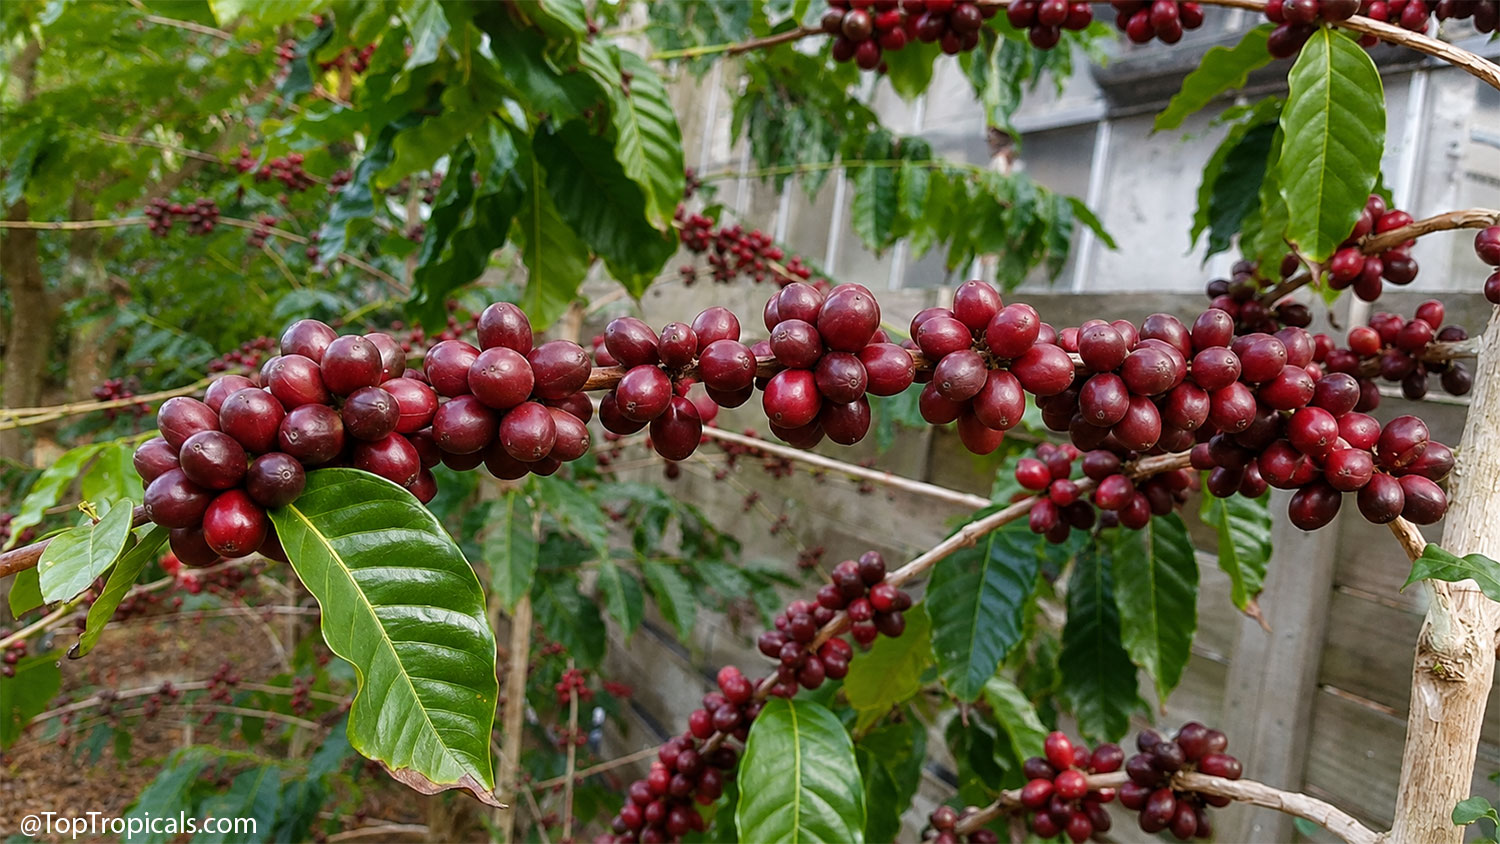
Once the flowers finish, small green cherries set along the same branches. They take months to size up and color. A mature plant often carries several stages at once, so you can find open flowers, hard green fruit, and ripe red cherries on the same branch. Flowering time depends on the plant's age, size, and growing conditions, so patience is part of growing coffee.
Practical Care
- Light: Bright filtered light or partial shade. Indoors, a plant will survive in modest light, but flowering and fruiting need more. An east or lightly shaded south window, or a supplemental grow light, is usually what it takes to get fruit.
- Water: Water regularly and consistently. Coffee is not a plant you can forget about. Let the top inch of soil dry out, then water thoroughly until excess water drains from the bottom of the pot. Never let the plant sit in soggy soil, as constantly wet roots can quickly lead to root rot. During the cooler winter months, reduce watering significantly. Coffee plants dislike the combination of cold and wet conditions and often enter a semi-dormant state in winter, when their metabolism slows and they require much less water.
- Soil and container: Well drained potting mix with some organic matter, in a pot with real drainage holes and no saucer full of standing water. We recommend Abundance - TopTropicals professional soilless potting mix with perfect drainage characteristics.
- Hardiness: USDA Zone 10-11. In colder climate grow in pot
- Temperature: Warm, and protected from cold. Coffee is not frost hardy, so in a marginal climate bring it in ahead of the first cold night when temperature drops below 40F
- Humidity: Moderate. Indoor winter air with the heat running is dry enough to brown leaf edges, and grouping plants or running a humidifier nearby helps.
-
Feeding: A balanced fertilizer during active growth in the
warm months, easing off in winter when growth slows. We put a scoop of GreenMagic controlled release fertilizer every 6 months and
liquid SunshineRobusta that is safe to apply with every watering, year around. Coffee
plants respond very well to fertilizers.
💡Read more about Sunshine Boosters and plant nutrition - Pruning and repotting: Prune lightly to keep the plant compact and encourage branching, since fruit forms on branches. Move up a pot size as roots fill the container.
From Cherry to Cup
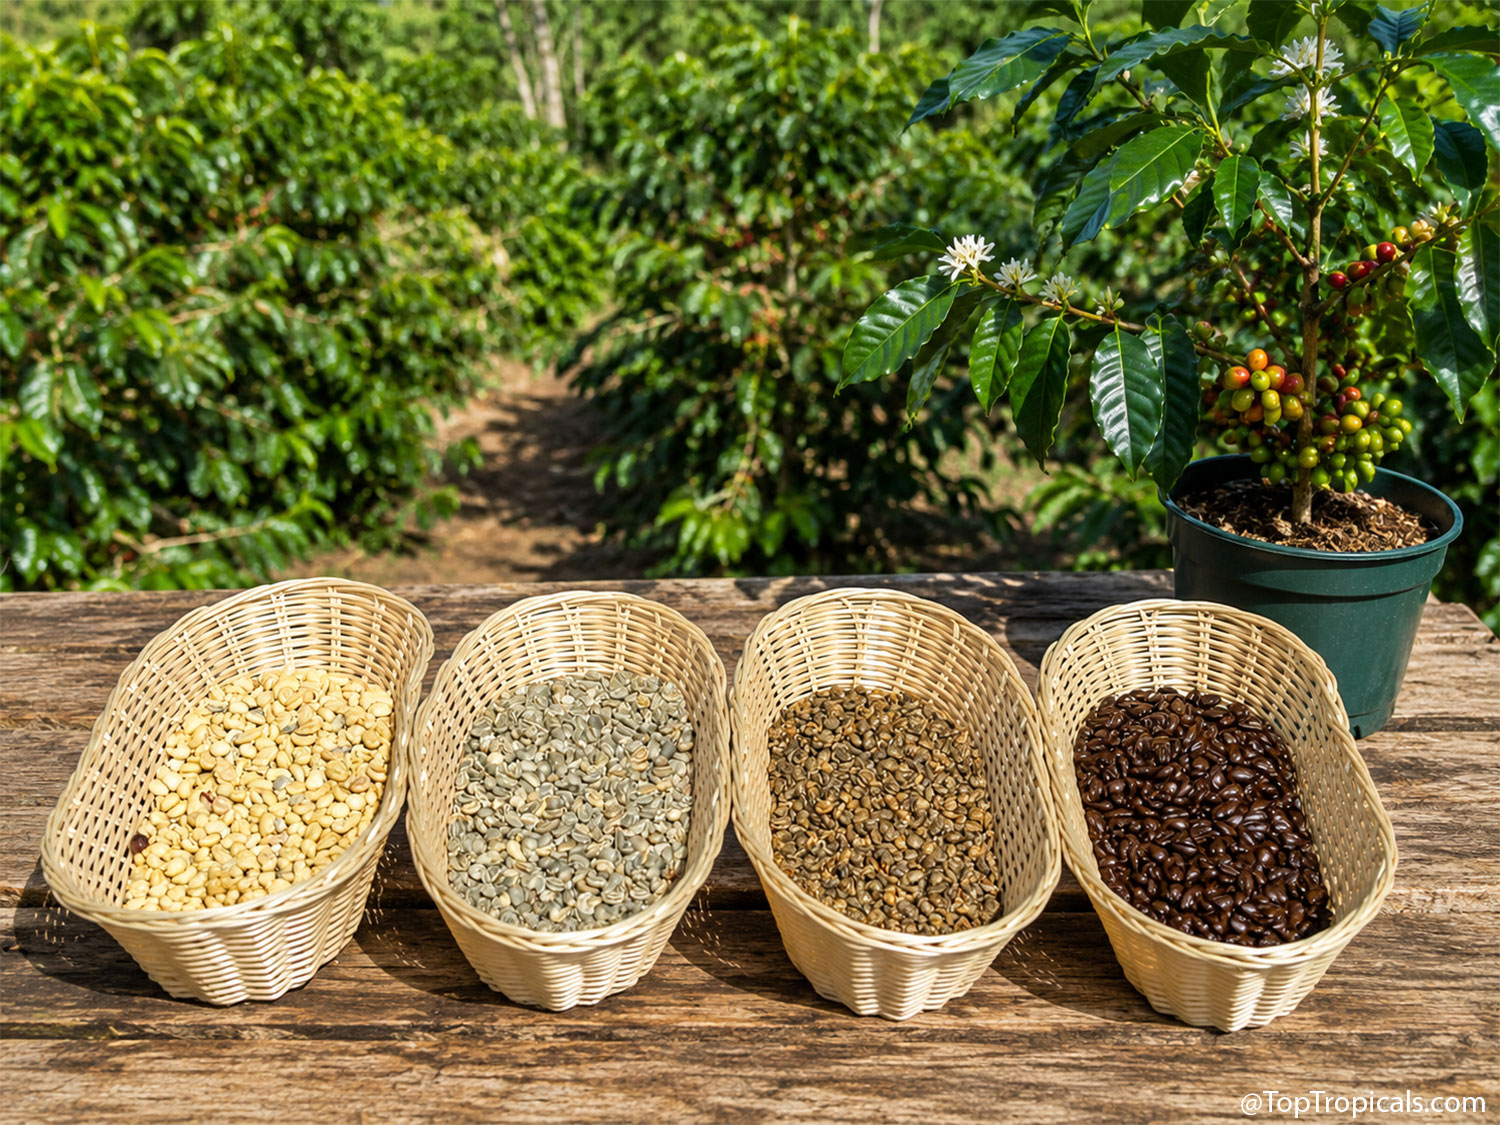
Yes, you can make coffee from your own tree. The process is not complicated, but each step takes time, and most of it is waiting.
- Pick fully ripe red cherries. Underripe fruit makes poor coffee, and ripeness on a single plant is uneven, so expect to harvest in several passes over a few weeks.
- Remove the fruit pulp. A small batch can be squeezed or rubbed off by hand. Underneath is a seed still wrapped in a slippery coating.
- Soak the seeds in water for 12 to 24 hours to loosen the slippery coating.
- Wash the seeds until they feel clean rather than slick.
- Dry them thoroughly, spread in a single layer, until they are hard all the way through.
- Remove the parchment layer, a thin papery husk around each seed. At this scale, rubbing the dry seeds between your hands and blowing away the loose husk works. Easy trick: give the dried beans a quick 1-2 second pulse in a coffee grinder - just enough to crack the parchment loose, not grind the beans. Then simply separate and discard the loosened husks.
- Roast the green beans. A heavy skillet over medium heat or a hot air popcorn popper both work. Keep the beans moving and watch the color.
- Cool them quickly and let them rest a day before grinding.
- Grind and brew as usual.
Home processing is small scale and imperfect. Batches vary, and the results are inconsistent by nature. The pleasure is in growing, harvesting, processing, and tasting coffee from your own tree. It also makes for good company. Pouring someone a cup and telling them it came off a plant in your living room tends to get more attention than anything else you could serve.
✍️ More details: From Coffee Cherry to Coffee Cup - Step by Step
How Much Coffee Will One Tree Make?
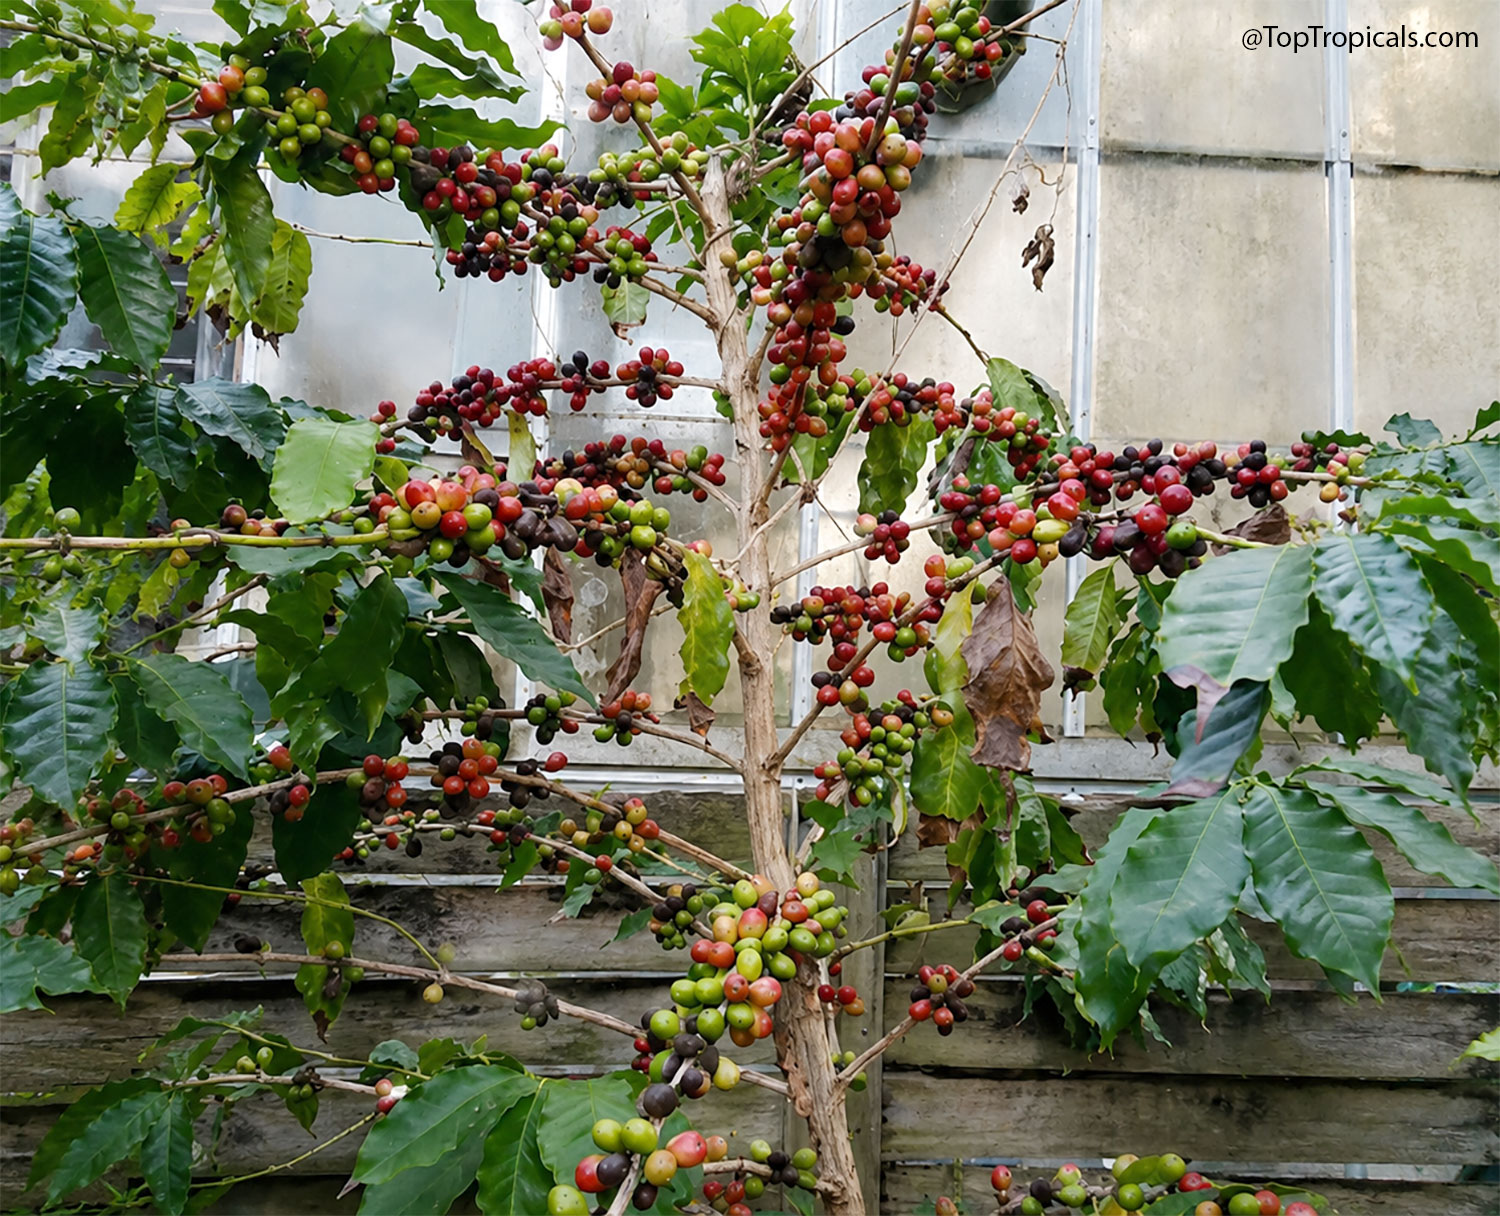
A home-grown tree usually provides a small personal harvest rather than a household supply. Yield depends on the size and age of the plant, growing conditions, how well the flowers set, and how many cherries actually ripen.
Think of a home coffee tree as an ornamental fruit plant that also produces real coffee.
As a Gift

Coffee works well as a gift for coffee drinkers and plant lovers, since the plant connects to something they already drink every morning. Shiny leaves, fragrant flowers, and colorful fruit come with it.
Grow the plant behind your morning cup.
☕️Shop Coffee plants: Grow It. Roast It. Drink It.
Smokey: The color is even and the roast looks good.
Sunshine: Excellent. I will inspect the donuts.
Smokey: You already inspected three.
📚 Learn about Coffee Tree from Top Tropicals Garden Blog
🎥 More videos about Coffee tree
Date: 3 Aug 2025
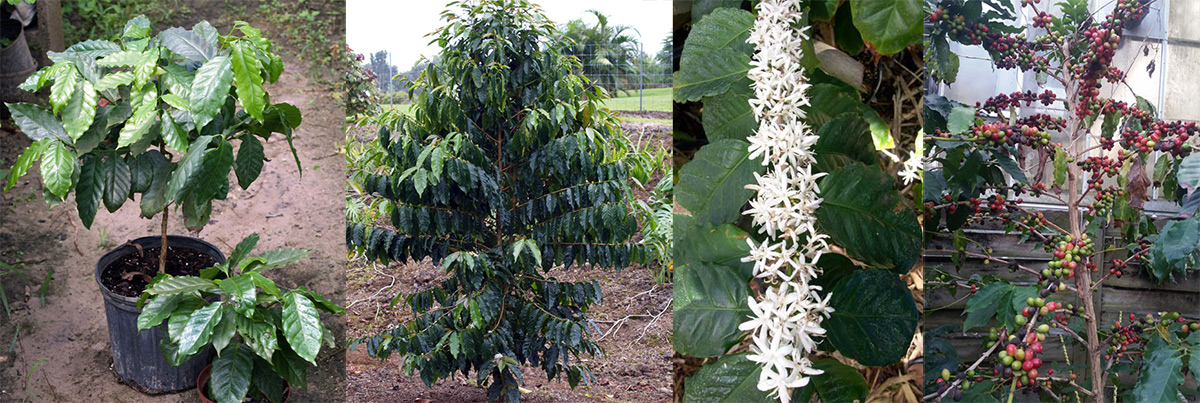
What is the most popular and easiest tropical fruit tree to grow indoors?
No doubt about it - it's the Coffee Tree.
- Coffee is shade-loving and easy to grow with regular water
- It grows into a dark green shrub or small tree (about 3 to 5 feet tall in a pot)
- Its fragrant, star-shaped flowers resemble gardenias
- The whole fruit is edible and turns green to yellow to red
- The seeds are real "coffee beans" that can be dried, roasted, and ground at home.
Five Reasons to Grow a Coffee Plant
- Perfect Indoor Fruit Tree: Thrives in filtered light and stays compact
- Low Maintenance: Forgiving, adaptable, and ideal for new gardeners
- Aesthetic Appeal: Glossy green leaves and clusters of white blooms
- Homegrown Coffee: Yes, you can roast your own beans.
- Year-Round Beauty: Evergreen with seasonal fragrance
 Coffee Plant Care Tips
- Light: Bright, indirect light is best. Avoid harsh afternoon sun.
- Water: Keep soil lightly moist but not soggy. Let the top inch dry out before watering again.
- Humidity: Loves higher humidity. Mist regularly or place on a pebble tray.
- Fertilizer: Use a balanced, gentle fertilizer like Sunshine Boosters C-Cibus every few weeks during growing season.
- Soil: Loose, rich, and well-drained. High in organic matter and slightly acidic. For potted plants, use a quality indoor tropical mix, such as Top Tropicals Abundance mix
- Repotting: Refresh soil and size up the pot every 1–2 years to keep roots healthy.
- Can I grow it outdoors?: Yes - bring it outside in warm months and back indoors before frost. It's best suited for USDA zones 10-11, but container growing gives you flexibility in cooler climates.
- How long until I get beans?: Expect flowers and fruit within 3 to 4 years from seedling stage - often sooner if you start with a young tree.
- What does the fruit taste like?: Mild and sweet-tart, like a mix between a cherry and a cranberry. You can eat it fresh.
How to Make Coffee from Your Own Tree
- Harvest: Pick the ripe red cherries
- Pop and Soak: Squeeze out the beans and ferment 1-2 days to remove pulp
- Dry: Spread out to dry for 1-2 weeks until hard and papery
- Husk: Remove the thin shell to reveal green beans
- Roast: Use a dry skillet or oven until fragrant
- Grind and Brew: Cool, grind, and enjoy the freshest coffee you've ever had.
Learn more: How to make your own coffee from homegrown beans
Coffee Health Benefits
- Rich in antioxidants - supports heart and brain health
- Boosts focus and mental alertness
- Supports metabolism and fat-burning
Why Coffee Makes the Perfect Gift Plant
- Long-living and beautiful
- Symbolic, useful, and personal
- Great for coffee lovers, gardeners, and the "person who has everything"
Date: 23 Jul 2026
How to Roast Coffee You Grew Yourself
How to Roast Coffee You Grew Yourself
☕️ How to Roast Coffee You Grew Yourself from Coffea arabica tree
Can you really roast coffee from your own tree?
Absolutely! If you can grow a coffee plant, you can harvest, roast, grind, and brew your own coffee at home. It takes a little patience, but the reward is one of the freshest cups of coffee you'll ever taste.
Every year our coffee trees, Coffea arabica, growing in 7-gallon pots, bloom in Spring, and by the end of Summer are covereed with fruit. When the fruit turns red, it is ready to harvest. Finally, it's time to roast our own Homegrown Coffee.
From Coffee Cherry to Coffee Cup - Step by Step
1. Sort the cherries
Harvest fully ripe red cherries. Remove green, damaged, and moldy fruit.
2. Remove the outer fruit
Squeeze each cherry to pop out the two seeds inside. A small hand-crank pulper can speed this up.
3. Soak the beans
Place the beans in a clean container, cover them with water, and leave them for about 12-24 hours. Light fermentation loosens the sticky mucilage.
4. Wash thoroughly
Rub and rinse the beans several times until the slippery coating is gone and the water stays relatively clear.
5. Dry the beans
Spread them in a single layer on screens or trays in a warm, airy location. Turn them frequently so they dry evenly. Protect them from rain, nighttime moisture, animals, and direct contact with soil. The beans will still be enclosed in a thin parchment shell.
6. Check for dryness
Drying may take one to three weeks, depending on humidity and airflow. The parchment should feel crisp and papery, and the bean inside should be very hard rather than soft or flexible.
7. Remove the parchment
Crack or rub away the dry parchment shell from each bean. You may carefully run them in a coffee grinder for just one second, just enough to clean the parchment. You now have unroasted green coffee beans.
8. Roast the green beans
Roast them in a coffee roaster, heavy dry skillet, air fryer, or oven. Keep the beans moving for even roasting. They will turn yellow, then tan, then brown, releasing a grassy smell that gradually becomes a familiar coffee aroma.
9. Listen for the first crack
The beans will begin making popping sounds. This is the first crack and marks the beginning of a drinkable light roast. Continue a little longer for medium roast. Stop before they become black, oily, or burned unless you deliberately want a very dark roast.
10. Cool immediately
Pour the roasted beans into a metal colander or tray and stir them in moving air. Cooling quickly stops the roasting process. Expect smoke and loose chaff, so roasting is best done outdoors or with strong ventilation.
11. Let the coffee rest
Leave the beans uncovered or loosely covered for several hours, then store them in a coffee container. Let them rest for about 24-48 hours before brewing so excess carbon dioxide can escape.
12. Grind and brew
Grind only what you need, brew it, and enjoy your own coffee grown, harvested, processed, and roasted at home.
🎥 Watch this video on YouTube
🛒 Shop Coffee plants: Grow It. Roast It. Drink It. ☕️
📚 Learn more:


• Coffea arabica in Plant Encyclopedia
• Coffee ripening
• Homegrown coffee - the journey begins
• How to make your own coffee from homegrown beans
• Coffee trees in bloom
• Brew Your Future: Grow Your Own Coffee
• What is coffee made of?
• Why Coffee tree is the best gift plant
• Top 10 fruit you'll ever need for your health benefits: #2. Coffee Tree
• What is the most popular and the easiest tropical fruit tree grown as a house plant?
🎥 • Don't drink your coffee until you see this
#Food_Forest #Container_Garden #Shade_Garden #Discover
🟢 Join 👉 TopTropicals
Date: 28 May 2025
How to make your own coffee from homegrown beans
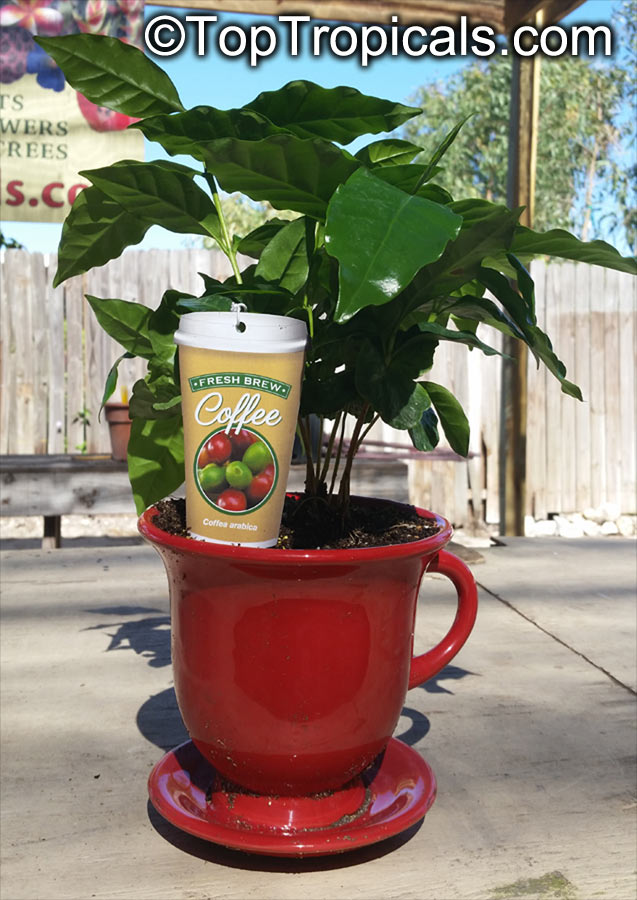
Coffee Tree in a cup (Coffea arabica)
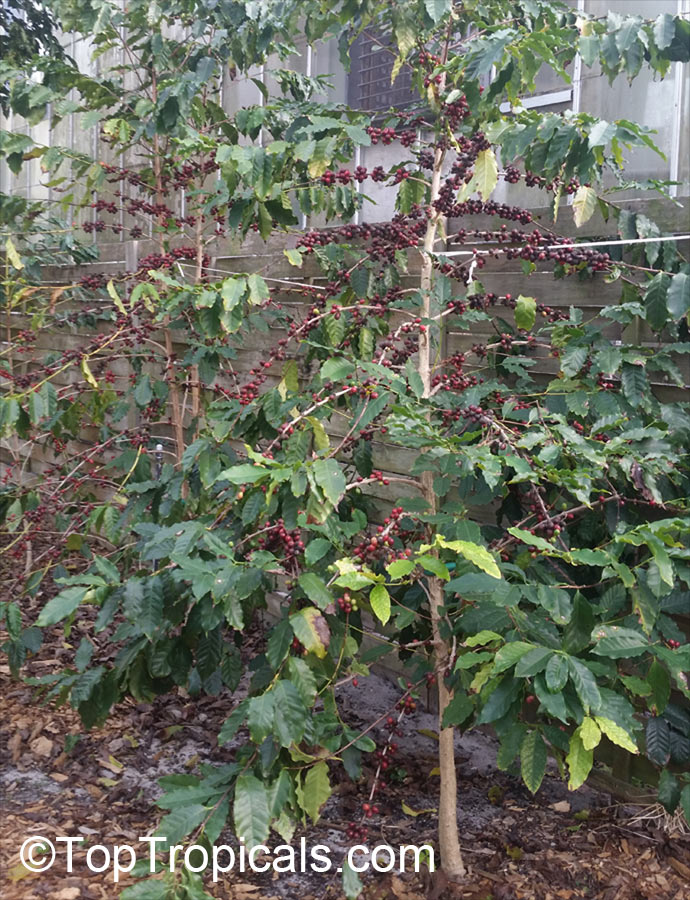
Coffee Tree with fruit (Coffea arabica)

Coffee beans (Coffea arabica)
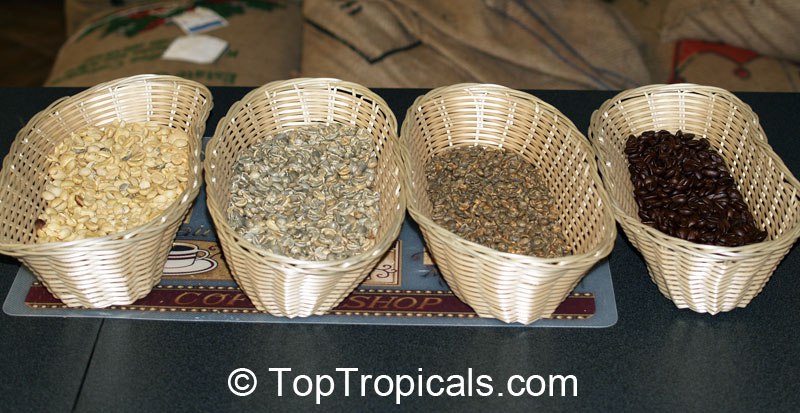
Coffee beans (Coffea arabica)

Coffee beans (Coffea arabica)
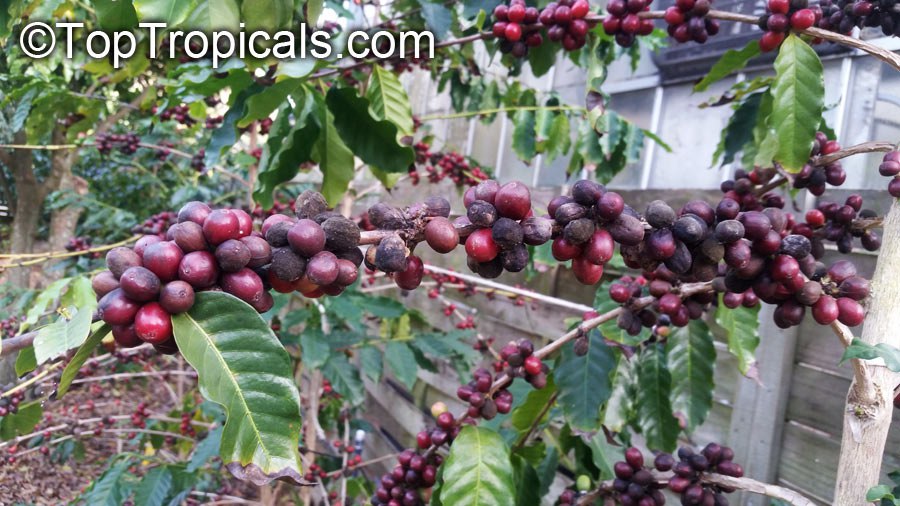
Coffee cherries on a tree (Coffea arabica)
☕️ How to make your own coffee from homegrown beans
Q: Can you make coffee from your own tree? Isn't there a process involved to prepare beans for it?
A: Absolutely! Yes, it is quite a process... But homegrown coffee lets you enjoy the freshest, chemical-free beans with rich flavor and the satisfaction of growing it yourself. Besides, it's fun! Below is a quick guide how to grow and make your own coffee from freshly harvested coffee fruit (called "cherries").
Harvest the ripe cherries
Pick the bright red fruits when they are fully ripe. These contain the coffee beans inside.
Remove the beans
Squeeze the cherries to pop out the seeds (beans). Rinse off any pulp and soak them in water for 1-2 days to ferment and remove the slimy coating.
Dry the beans
Spread the clean beans on a tray in a sunny, dry spot. Let them dry for 1-2 weeks, turning them daily, until they feel hard and papery.
Remove the parchment
Once dried, crack and remove the thin husk around each bean. You now have green coffee beans ready to roast.
Roast the beans
Use a dry skillet or oven. Heat until beans turn brown and fragrant, stirring constantly. The longer you roast, the darker and stronger the flavor.
Cool and grind
Let roasted beans cool completely, then grind them just before brewing. Enjoy your homemade cup of fresh coffee!
🛒 Grow it. Pick it. Roast it. Drink it. Buy your coffee tree now!
📚 Learn more from previous posts:
• Coffee trees in bloom
• Brew Your Future: Grow Your Own Coffee
• What is coffee made of?
• Why Coffee tree is the best gift plant
• Top 10 fruit you'll ever need for your health benefits: #2. Coffee Tree
• What is the most popular and the easiest tropical fruit tree grown as a house plant?
•
#Food_Forest #Container_Garden #Shade_Garden #Discover
🔴 Join 👉 TopTropicals
Date: 7 Mar 2026
🌞 Spring Nutrition Strategy: How to Identify and Fix Plant Nutrient Starvation

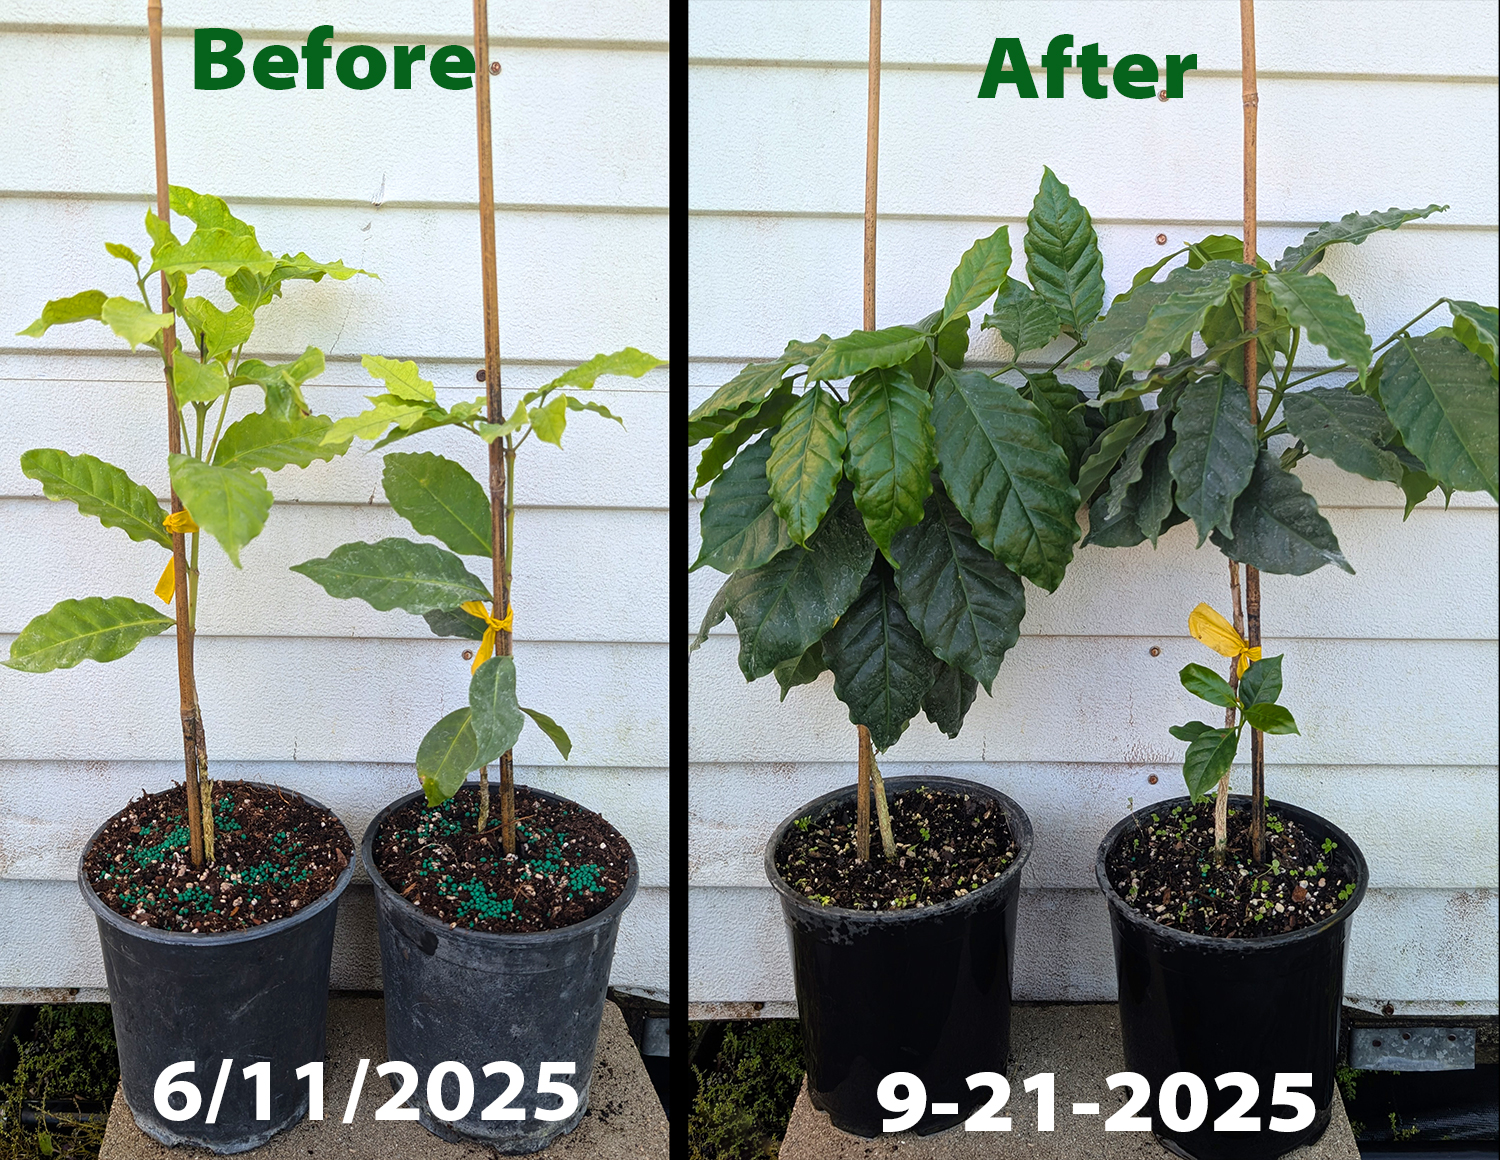
Smokey: It's not dying. It's starving. Classic nutrient collapse. Imagine going two days without donuts.
Sunshine: Two days? That's a PeopleCats rights violation. Catstitution First Amendment: food, including donuts, must remain available.
Smokey: Exactly. Plants feel the same. Let's feed it. Sunshine Robusta. Robusta is coffee, you know.
Sunshine: Obviously they named Sunshine Boosters after my charm. And since it's coffee, it should work perfectly.
One month later
Sunshine: Holy whiskers! You're a magician.
Smokey: No magic. Just boosters.
Sunshine: Great. Coffee is on me when this tree starts producing. You bring the donuts.
Read more about Smokey & Sunshine
Fellow gardeners,
Spring has arrived, and plants are coming back to life. New shoots are
appearing, fresh leaves are unfolding, and roots are beginning to grow
actively again. As plants enter this important stage of the season, they
need more than just water to support their growth. Proper nutrition is
essential for strong development and healthy
plants. SUNSHINE
Boosters provide the balanced nutrition plants need to start the growing
season strong.
A simple rule we follow in our nursery: new growth responds best to foliar feeding. When nutrients are sprayed directly on the leaves, plants can absorb them quickly and efficiently.
- Immediate action – nutrients are absorbed through the leaves and start working right away.
- No delay traveling through soil – plants do not need to wait for nutrients to move down to the roots.
- Avoids soil lockout – micronutrients can become unavailable in high pH soils, but foliar feeding bypasses this problem.
- Supports stressed plants – when roots are cold, damaged, or newly transplanted, foliar feeding helps plants recover faster.
However, sometimes plants begin to show visible nutrient deficiencies. Yellow leaves, slow growth, brown leaf edges, or distorted new leaves are often early signs that the plant is missing essential elements needed for healthy development.
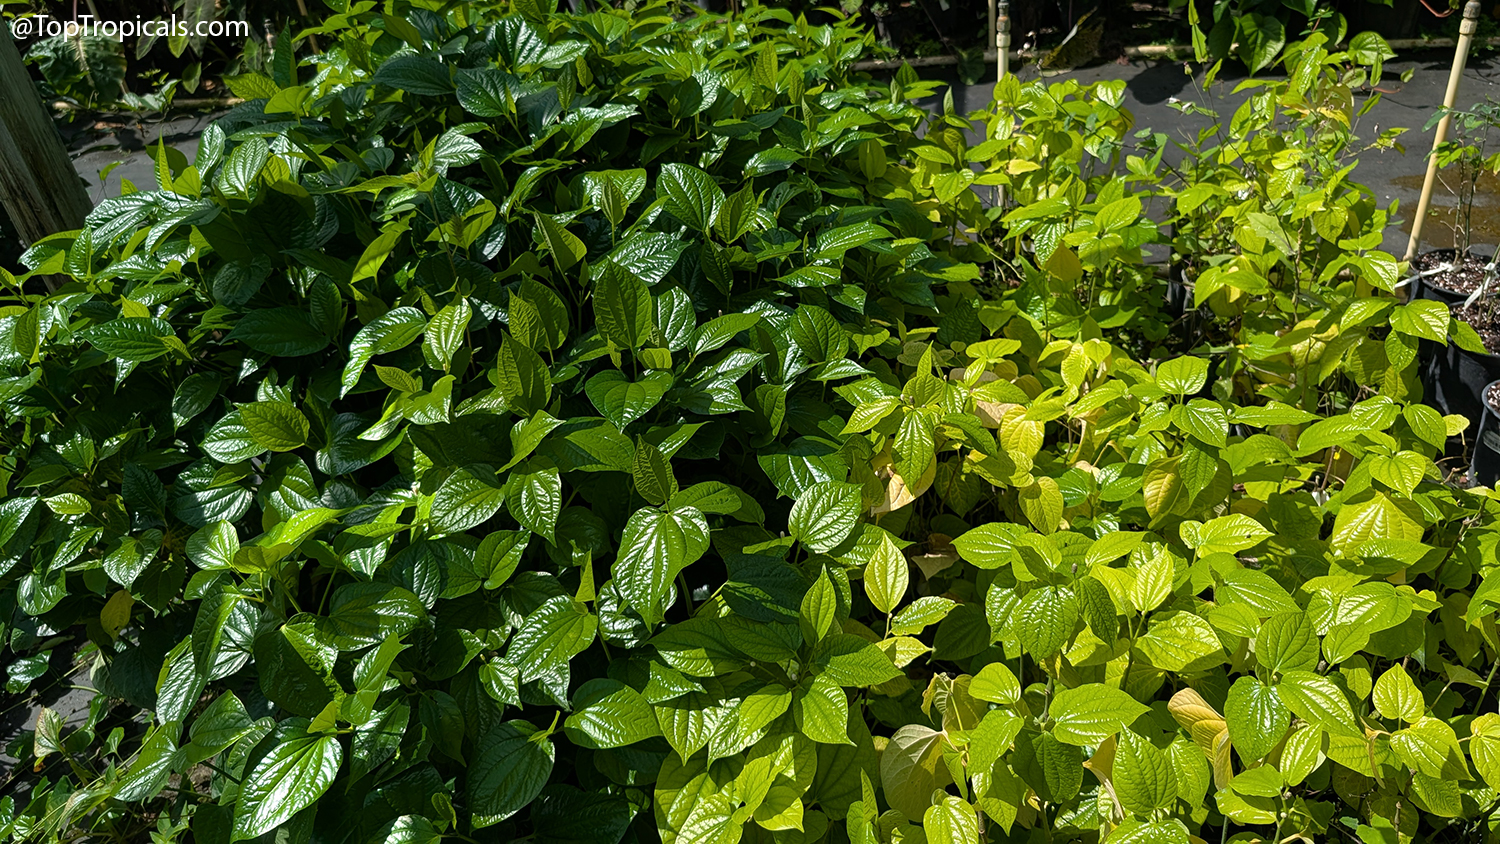


These symptoms are especially common in container plants, where nutrients can be quickly depleted or become unavailable due to soil pH and watering conditions.
Use the quick reference table below to identify common nutrient-related symptoms and the recommended SUNSHINE solution to correct them.
| Symptom you see | What to do |
|
Pale leaves, slow growth, weak new shoots (often nitrogen related) |
Spray SUNSHINE Robusta to stimulate strong vegetative growth. |
|
Brown leaf edges or weak plant vigor (often potassium related) |
Apply SUNSHINE Robusta to restore nutrient balance. |
|
Yellow leaves with green veins (iron or manganese deficiency) |
Apply SUNSHINE Superfood to correct micronutrient deficiency. |
|
Small distorted leaves or poor flowering (zinc or boron deficiency) |
Use SUNSHINE Superfood during active growth period. |
🌿Foliar Feeding: How Much and How Often
For most plants, foliar feeding works best when applied lightly and regularly during active growth.
- Regular feeding (maintenance): Mix with tap water according to the ratio on the label. For SUNSHINE Robusta use 25 ml (5 tsp)per gallon of water and spray leaves every 5-7 days during active growth.
- Correction feeding ("medicine" dose): if plants show visible nutrient deficiencies, combine SUNSHINE Robusta with SUNSHINE Superfood and spray every 5–7 days until new growth appears healthy. All SUNSHINE Boosters products are compatible and can be mixed with water in the same sprayer.
- Best time to spray: early morning or evening when temperatures are cooler and leaves can absorb nutrients efficiently.
- Important: spray both the top and underside of leaves for maximum absorption.